Part 1: Putting the Database in the Cloud
This is the first part of a tutorial for installing the DevExpress MainDemo.Web to Amazon Web Services, but the same principles apply to any ASP.NET web application.
This part covers creating an Amazon RDS instance running SQL Server Express and connecting a (locally running) MainDemo to it.
At the time of writing the DevExpress version is 12.1.7.
Amazon Web Services
If you have not already done so, you will need to sign up with Amazon Web Services. There are costs associated with AWS, but the tutorial only uses very small cheap instances which cost as little as 2 cents per hour to run. Also, new customers get a load of hours for free as part of the AWS Free Usage Tier. See the AWS pricing for more information. Don’t forget to terminate your instances when you have finished.
AWS Toolkit
Amazon have made it all easy by providing a Visual Studio add-in.
Install the AWS Toolkit for Microsoft Visual Studio. If you haven’t used it before, then when you start a wizard it will ask you for your AWS fcredentials.
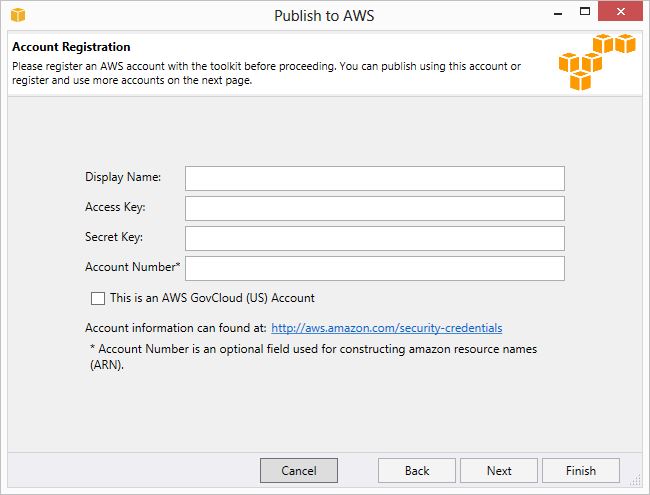
The Display Name is the a name you give to the AWS account you are using. I set mine to zerosharp. This is helpful when you have multiple AWS accounts. The Access Key and the Secret Key are both available on the security credentials page - you will have to click Show in order to display the secret key. You can leave the account number blank.
The database
Now let’s provision a new SQL Server Express database.
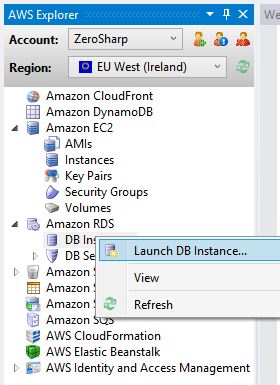
In Visual Studio, open the AWS Explorer (Ctrl+K,A or in the View menu). You probably want to select a region near your physical location. I chose EU West (Ireland). Right-click on ‘Amazon RDS’ and select ‘Launch Instance’.
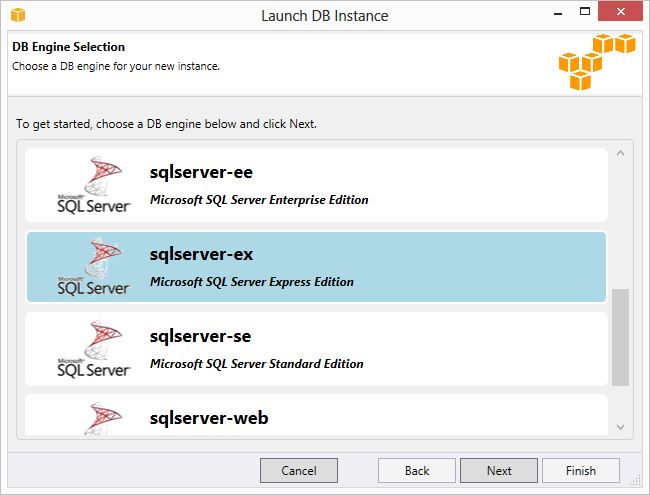
At the following screen, select SQL Server Express. Note that we could just as easily provision the Standard or Enterprise editions as well as a host of other database options.
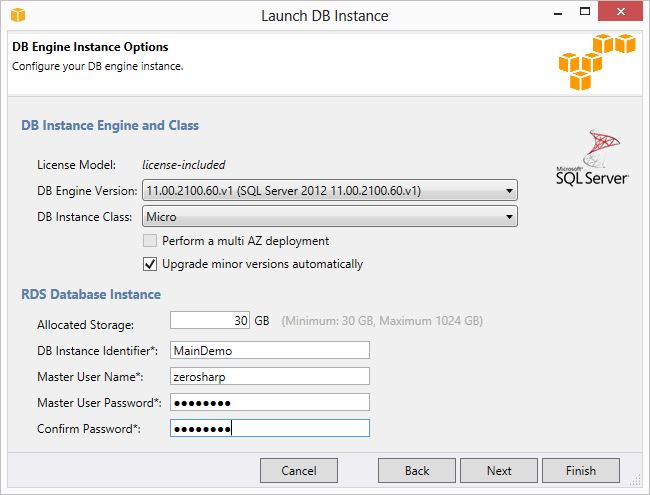
Configure the settings for the connection. Choose an instance class of Micro which is fine for our needs. Note the Master User Name and the Master User Password will be needed when we modify the MainDemo’s connection string.
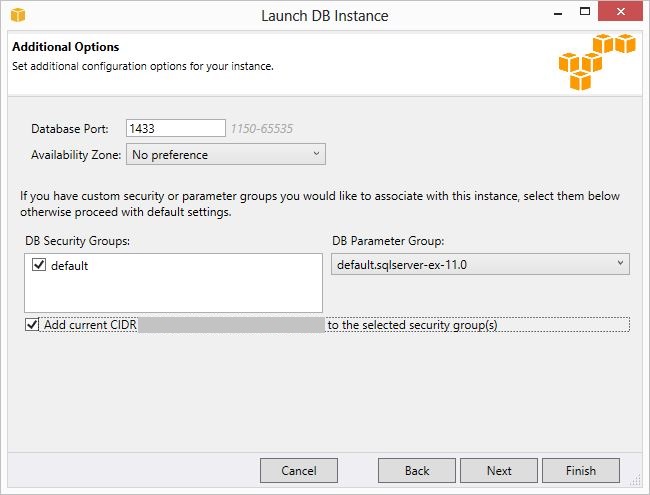
In this screen we configure settings for the port and security. In order to connect from our local MainDemo, you need to add the permission for the your CIDR route which will let you connect to the database from your local machine. It’s easy to add it to the default group later (via DB Security Groups).
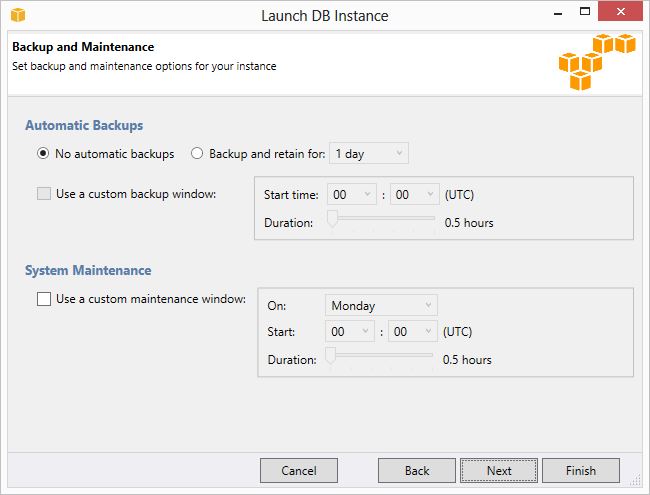
Set the backup options to ‘No backups’. Nice to have the option though.
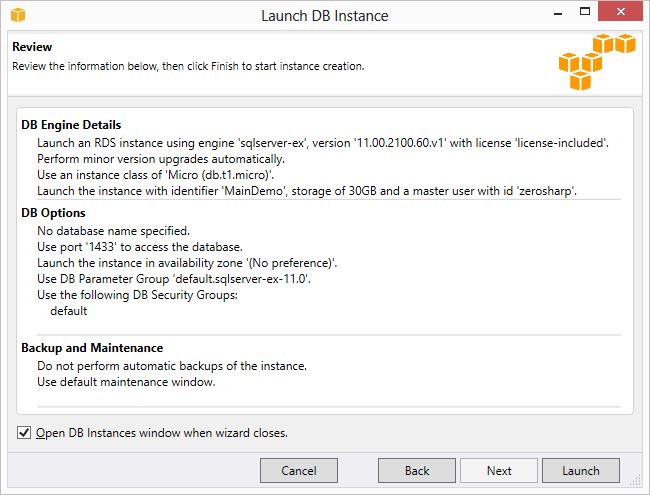
Review the options and click ‘Launch’.
The database instance will be available after a few minutes. You have to be patient here - there is not much feedback, just the yellow creating status. You can press ‘Refresh’ once in a while, but it’s likely to take up to 15 minutes. Eventually you should see a green created status.
Modify the MainDemo connection string
Open the MainDemo in Visual Studio. Open the web.config file and set the connection string to point to your Amazon RDS instance.
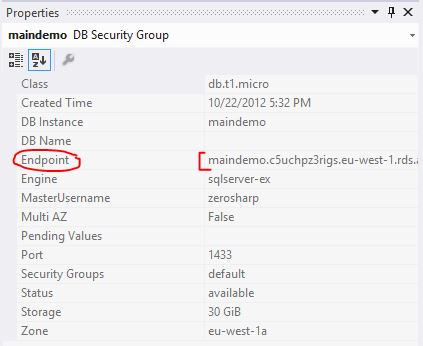
The ‘User ID’ and ‘Password’ should be the same as the ones you entered above. The address is available from the Visual Studio Properties window as ‘Endpoint’ when you select the DB Instance in the AWS Explorer.
My connection string looks like this:
<add name="ConnectionString" connectionString="User ID=zerosharp;Password=password;Pooling=false;Data Source=maindemo.c5uchpz3rigs.eu-west-1.rds.amazonaws.com;Initial Catalog=MainDemo_v12.1"/>
Run the MainDemo locally
Now run the MainDemo locally. When you get to the login page, login as Sam (no password). At this point, the MainDemo will connect to the Amazon RDS instance using the connection string we specified above and create the database (which takes at least 30 seconds on my machine). Afterwards the MainDemo will function as normal.
Next up
In the next post I explain how to publish the MainDemo application itself to an EC2 instance in the Amazon cloud.